July 19th, 2012
Stencil Star: Carmen Benoit
This week’s installment of our Stencil Star™ series has us traveling virtually to Arizona to see the incredible works of Carmen Benoit of Carmen Illustrates. She uses Royal Design Studio wall stencils and patterns in creative and unique ways for her murals, decorative paint finishes and her fine art pieces. Her love of stencil patterns and rich colors stem from her experience as a textile designer, love of design and travels.
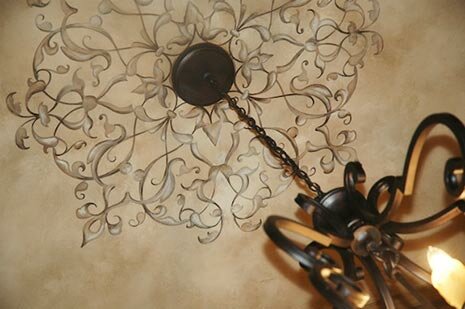
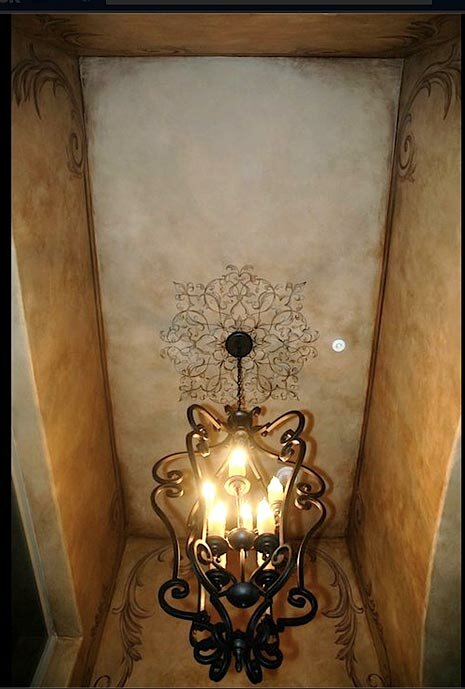
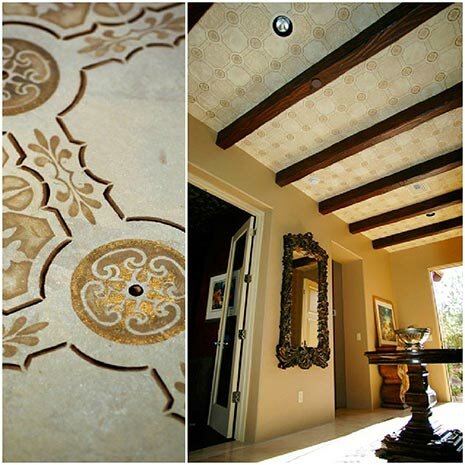
(above, below) A close-up and full shot of an entryway. A Modello Eastern Center design (EasCen135) was selected for the base of the lighting fixture and done first. Then there was glazing followed by hand painting in highlights and shadowing on the stencil design. Carmen shares, “This was the first Modello vinyl stencil I ever used and I have been hooked ever since! Its ease of application offered many more possibilities over the tracing paper method I was using before.”
ABOUT CARMEN ILLUSTRATES
Her first stop was to achieve a degree in Fine Arts from ASU. After graduating, she created textile art for the clothing industry, working for an Indian company and later for a resort wear line. Exciting as the textile industry proved to be, the direction was not fulfilling enough not where she ultimately wanted to apply her talents.
In 1998, she decided to create her own business, Carmen Illustrates, to apply her talents toward the home decor market and commercial properties. She has since painted murals and created artwork for clients all over the country. “From the beginning, it has always been about establishing sound technique––drummed into my head every time I dipped the brush…perfect the circle, push the negative space, achieve greater balance. I still remember my art instructors barking orders as they circled my canvas, arms folded. But in a unique way, it established the foundation of my work ethic. Art was a discipline and I needed to understand that,” she explains. “I love to travel and study wall finishing techniques all over the world. I enjoy life with my “official fan club” – my husband Edwin, and our two cocker spaniels, Bianca and Enzo,” Carmen says. “There is no greater reward then seeing people achieve a better quality of life through an enriched environment. I have incorporated Modello Design stencils to help enhance my environments. These products have proven to be a time saver and add a new dimension to my service offering.”
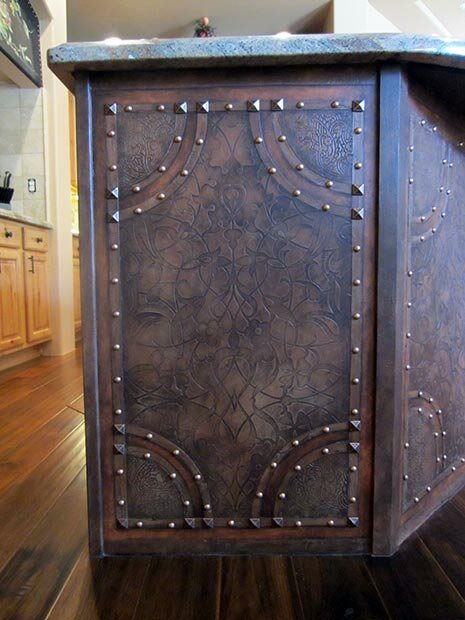
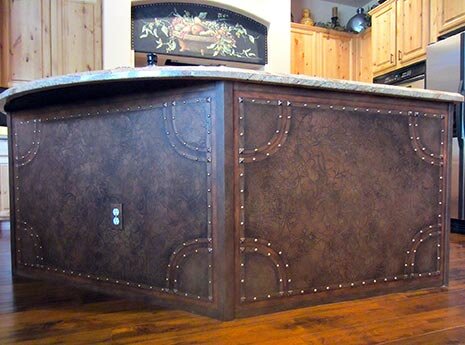
(above, below) Close-up and full shot. A plain particle board island was given a face lift in a kitchen as opposed to getting all new cabinetry. Plasters were used to create the embossed look of leather with the help of the Allover Arabesque Moroccan stencil in the central panels. The corner quadrants were created with an Indian block print. The raised seaming was done and copper tacks pounded in. On a side note, have to say that the Modello weeding tool that is included in every order came in quite handy for first creating the holes where the tacks would go!
(below) An elegant pattern in between the beams was desired so the Modello Marquetry vinyl stencil (MarqALL102) was made into a custom mylar stencil but slightly altered so that every other space was left open. (The client was concerned it might get too busy.) The ceiling inserts were done on canvas in the studio and then later installed. To this day I love the pattern and my next vision for it involves an outside umbrella!
What draws you to Stenciling?
Stenciling has become another tool just like a new brush or specialty paint. I love the ability to create dimensional effects as well as layering looks. It also is a very cost effective way to transfer a design without using the traditional tracing paper method to create a template and then to elaborate on. I am learning new applications everyday and love how I can pattern a wall, pillow, drapes or an outdoor umbrella in no time. I find the possibilities are endless…
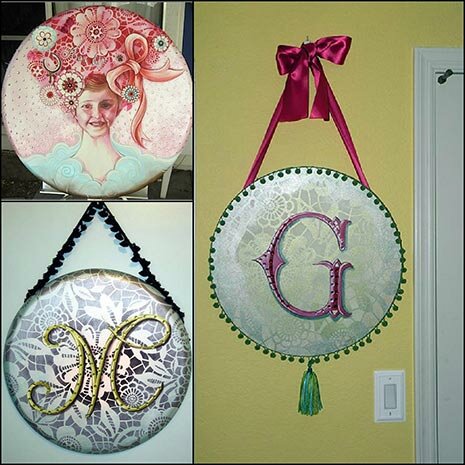
The images above are all of custom canvases done with the Skylar’s Lace Floral stencil from the Allover Damask Collection. I absolutely love this pattern and find it quite versatile!
What would be your dream Stenciling project?
Teaming up with an incredible group of talented artisans to work an exotic location like Morocco. The Peacock Pavilions Moroccan painting trips come to mind…or in a church in San Miguel del Allende (perhaps stenciling some beams with incredible patterns of color)…or being ask to collaborate on an Anthropologie retail space to enhance their environmental design. All would be perfectly fine with me!
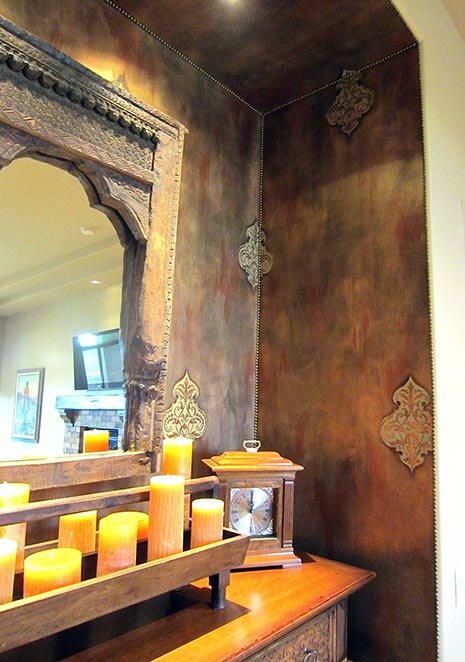
A master bedroom had two niches that required a little bling and definition. The solution? Modello Designs Turkish Emblems stencils, a metallic foil treatment and French upholstery tacking to frame it off.
What is/are your top Stenciling tips?
If there were any helpful tips I could offer based on my experience it would be to keep the stencil moist while working. Also make certain to keep it clean. I have noticed that especially when working with dimensional plasters that there is a build up of material as you work. Wiping over it with a damp rag as you work helps keep your lines clean (no seepage) through the pattern and less clean up in the long run.
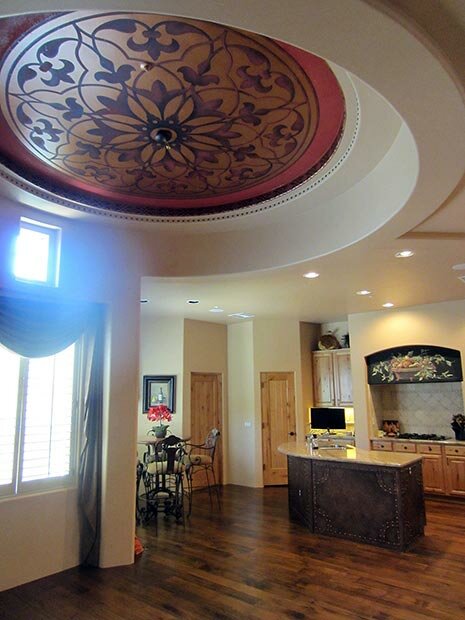
(above) “My latest ceiling was a rotunda in a dinette area. Once again the Modello design team accommodated my request of taking an Eastern Border vinyl stencil pattern (EasBor314) and adapting it into a mylar stencil. The finish techniques involve metallic paints and foils as well as glazing and Venetian plaster,” Carmen explains. For the center, she used a Modello Easter Center stencil (EasCen136) and after the Modello’s removal, hand painted details were applied. Tacks were added as a finishing touch. You can spy the embossed leather island in the background.
It’s been such a pleasure sharing Carmen’s stencil and Modello pattern work with you! I am also really enjoying learning more about the backgrounds of our artists through this Stencil Star series! Her talent, education and textile design background really show through in her attention to detail and quality of her work, don’t you think? To see more of Carmen’s talents do check out her website, Carmen Illustrates, and follow her projects on her Facebook fan page.
February 25th, 2011
Get a New Look
One of the great things about having businesses that focus on creating awesome patterns for decorating just about any surface is that there are so many opportunities to work with different companies who have awesome PRODUCTS that can be used with our designs! Modello Designs has recently joined forces with New Look to see what kind of magic can be created with our Modello stencils and their easy-to-use, water-based concrete stains and environmentally friendly etching gel.
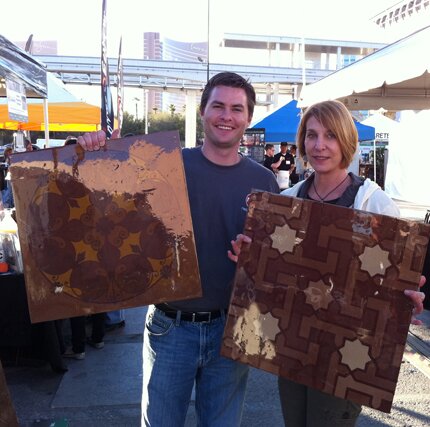
I popped in to the recent World of Concrete show in Las Vegas to visit with Jacob Webb, and the nice people from New Look at their booth there.
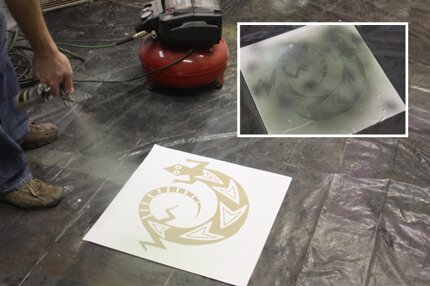
The simple process starts with 2 coats of their Solid Color Stain, (not shown) which comes in a ton of great colors and is easily broomed on. Then, one or more of their Translucent Designer Enhancer colors is applied with a spray gun through the Modello stencil pattern.
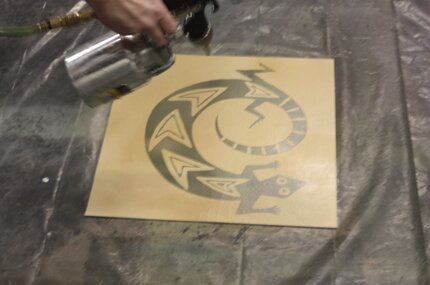
To soften the effect, a complimentary color can then be applied overall, after removing the Modello stencil.
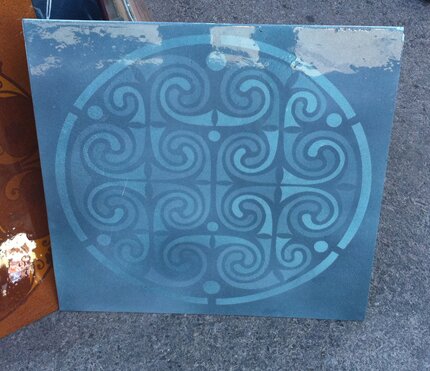
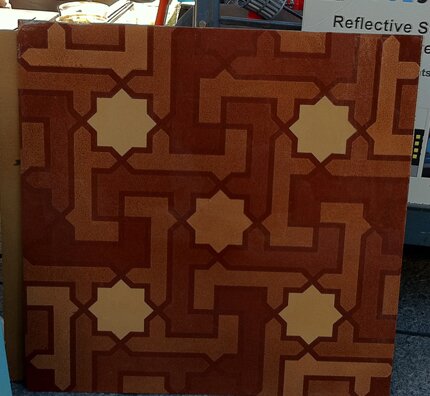
Above are two examples of easy Marquetry effects that can be achieved by applying layers of color after different areas of the design are removed, one layer at a time.
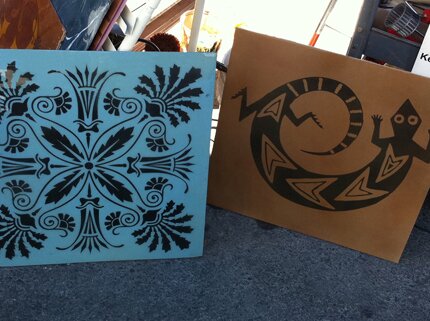
The light “airbrushing” technique used with the Designer Enhancer Stains gives a nice, crisp edge to the patterns.
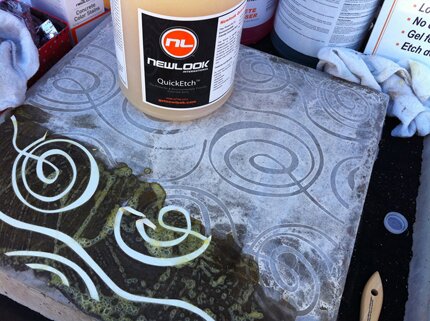
I was really excited about their QuickEtch etching gel! This is a water-based, biodegradable, non-corrosive surface etching solution that etches concrete surfaces WITHOUT acid. I have used acid-based etching gels in the past, and this works just as well without the hazard and worry of using a dangerous chemical. You can find more information on concrete etching with Modello patterns here and an example of a finished project here. I love the organic look of etched concrete, especially with the addition of Modello stencils! ![]() New Look has training and distribution throughout the country, and provides a great alternative to acid staining and etching! You can find more information about our New Look collaboration here on our website, as well as links to more information and some instructional videos.
New Look has training and distribution throughout the country, and provides a great alternative to acid staining and etching! You can find more information about our New Look collaboration here on our website, as well as links to more information and some instructional videos.
March 23rd, 2009
Painting Play Date
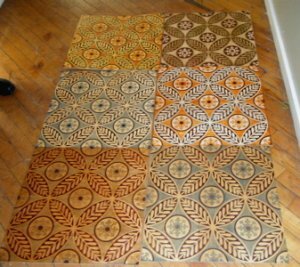
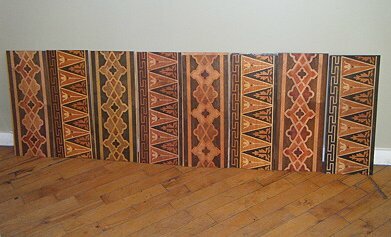
Carol Leonesio, who has her very own Painter Girl blog, also write for the Stencil Talk blog over at www.stencilsearch.com sent me a lovely email today about a “play date” that was arranged in her area to gather together local decorative artists for sharing creative inspiration, potential projects and mutual support. This is such a great idea in this day and age when we all need a little “extra” from our friends! We have a similar group that has formed here in San Diego that I’ll tell you about in my next post, but meanwhile, check out Carol’s post about their creative learning and sharing day spent working on some marquetry techniques and samples that they got from Modello Designs.
`
I feel very honored that they chose to use our products for their first get together. Thanks for YOUR support girls!
May 9th, 2008
Floor Focus
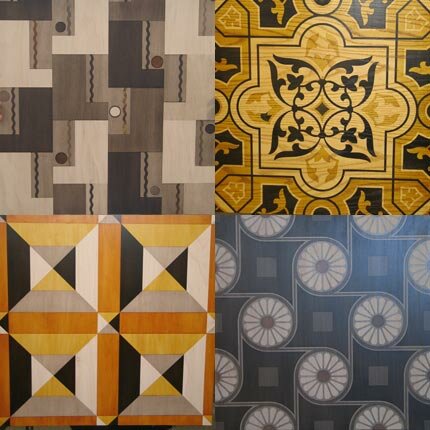
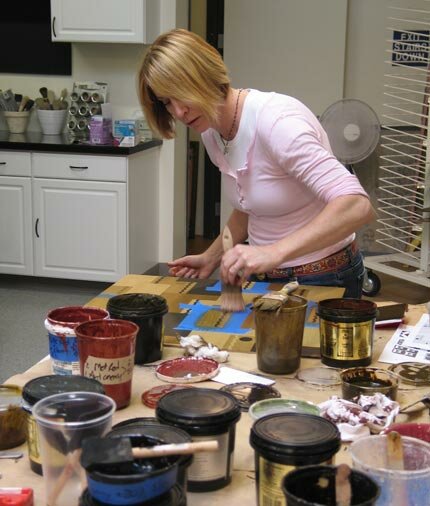
Well, I just have finished up my first Floor Focus class today and the class and boards turned out so well I decided I MUST share before heading home! I turned everyone a little loose this time and gave them each a different mix of patterns, some instruction and suggestions and had them plan out their own color selections. There were so many “winners” I decided to get a photo of each board along with the “recipe” so we can print them off and share them among the whole class. In no particular order, here’s Andreas…
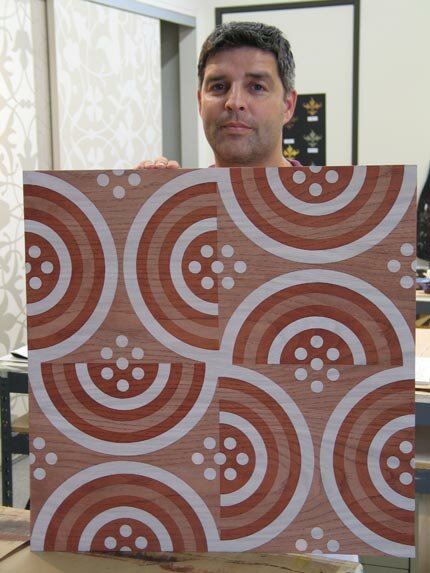
Kim…
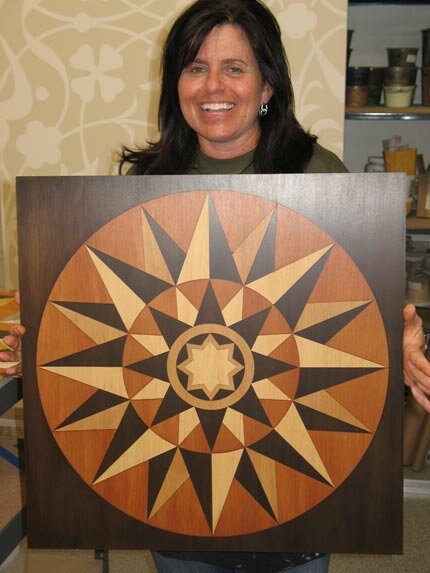
Jamey…
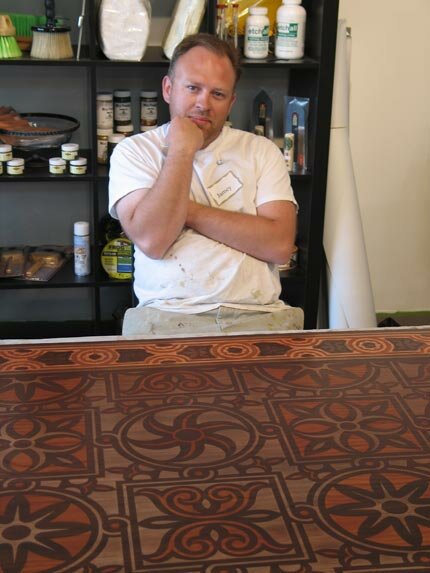
Sharman…
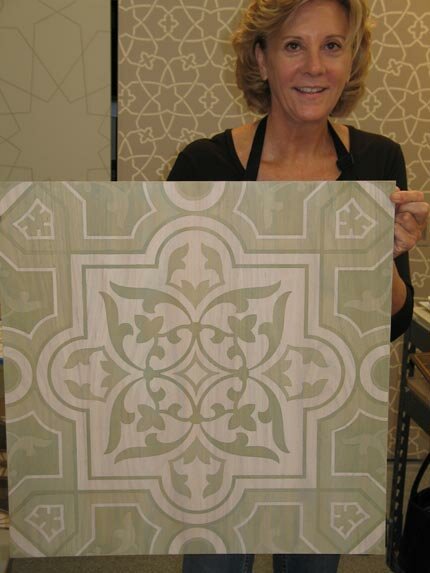
Kersteen…
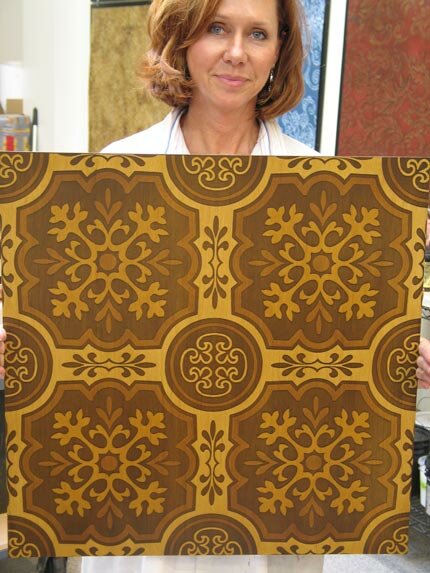
Brent…
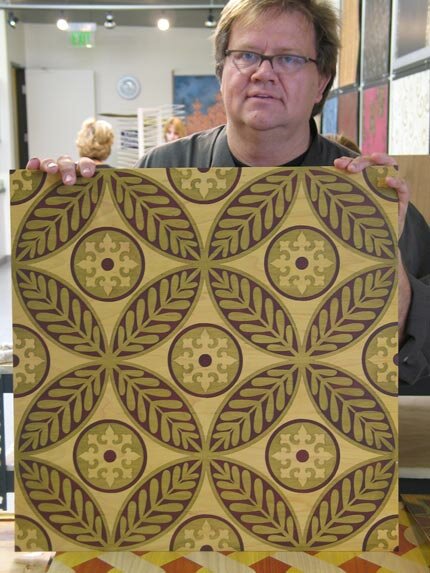
Julie…
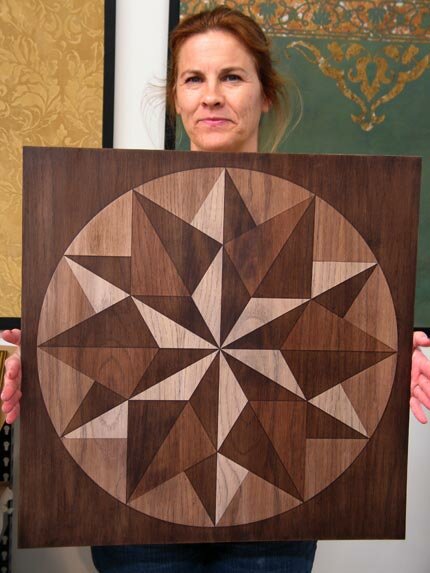
Some assorted boards that deserve to be seen headless…..
and to be totally fair, a seriously bad shot of me.
Aren’t they cool?? The next Floor Focus class is scheduled for November 10-11. I can’t wait to see what develops then….
April 28th, 2008
Ready, Set, SALI

Woohoo! Online registration begins THIS morning for classes at the 28th annual SALI Convention. Even though I am *very* young, I have been a member of this organization since it’s first year. My membership cards states I am member #31! I served on the board of directors back in the 90′s (seems like a century ago) and was incredibly honored and extremely nervous when they asked me to be the keynote speaker at the convention banquet 3 years ago in 2005.
I chose to use the moment to trace my history in the industry along with the history of the organization-and ended by *suggesting* that it may be time for a name change. You see, The Stencil Artisans League is a name that we have outgrown as this organization has long been representative of the decorative arts and decorative finishing in a much broader sense: Murals, decorative finishes, plasterwork, gilding, and concrete to name just a few of the mediums represented at our convention and exposition. Well, that was enough to get me lassoed into chairing the name change committee and FINALLY we will be announcing the new name for the organization at the annual meeting in July. It will either be IODA (International Organization of Decorative Artisans) or IDAL (International Decorative Artisans League). Drumroll please! And the winner is? Can’t tell you. Someone will kill me. Guess you will just have to be there!
I am really looking forward to this, my 15th year as an exhibitor and instructor. Having never been to Charleston OR South Carolina, I am ready to soak up some Southern charm. I even have a suggestion if you are wondering what class to take on Thursday, July 24 from 8-12. Faux Marquetry with Modellos, of course!
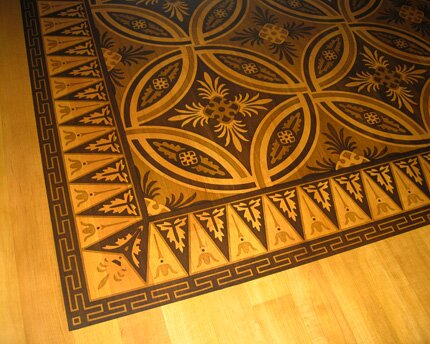
Even if you or not interested in attending that or any of the other fabulous classes, you should come by for the Expo full of industry booths and ongoing demos. We will be introducing our new Design Library Binder, Modello by Design book, new designs and some other surprises!
Update! My class sold out right away. Yeah! I’m sure it helps that noone was offering anything similar. I’m hoping they will give me a second time slot…..
February 20th, 2008
More Floor
Remember this? It’s done, it’s gorgeous, it’s mine! I won’t bore you with all the layers-the many layers….
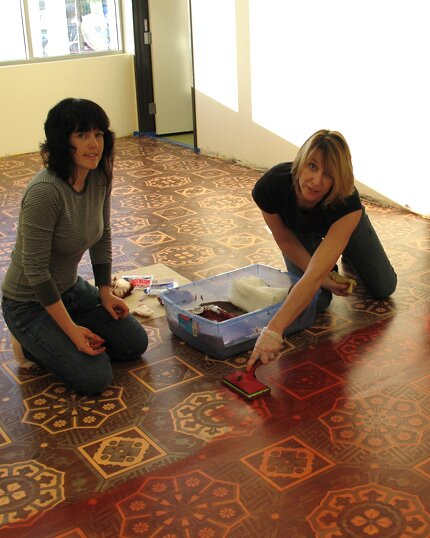
We stained for days.
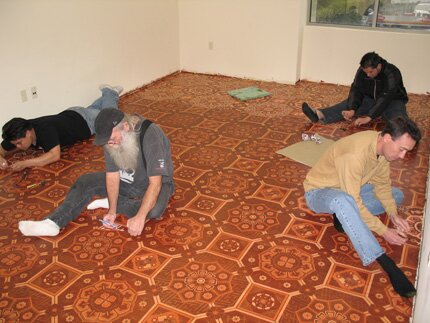
They removed the pattern for hours.
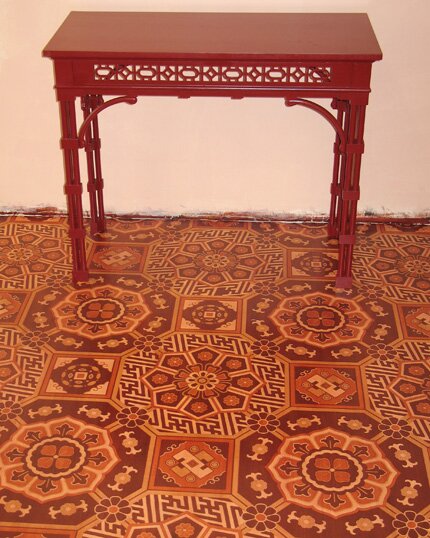
I can hardly wait to decorate. Oh wait! We still have to do the walls and ceilings. Back off, girl.
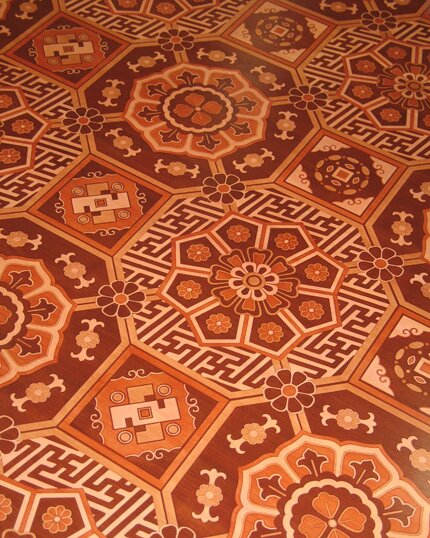
Let’s just enjoy the uninterrupted pattern for awhile.
February 7th, 2008
The Insanity Continues….
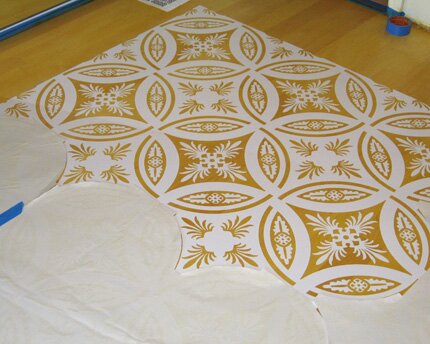
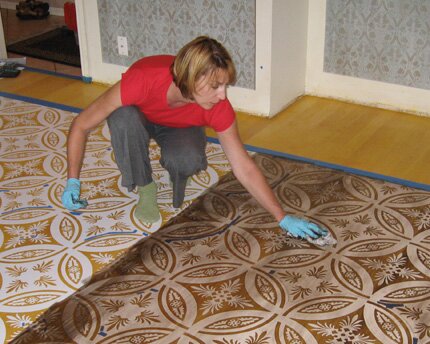
Your’e familiar with the K.I.S.S method? Keep it simple stupid! That just doesn’t seem to fly around here. Wow, it would have been SO easy to just stencil a nice simple border design around the edges of the hardwood floor in my office. That way, I might actually be WRITING this from a real office instead of setting up a makeshift desk out in the hallway. But no-o-o-o, I had to fall in love with this classic, historical oriental design and the challenge of actually being able to do something with it! We decided to make it work with our Modello Marquetry Masking System, wherein we just weed a portion of the design to start and then remove certain elements for certain colors and apply stain in a sequence of layers. Well, I think it took a month or so just to get the design to work, cut correctly and fit together properly, but Lauren and Miguel came through and guess what? It works!! It’s not actually DONE yet, but I feel so thrilled that we’ve gotten through the hardest part (getting it to work and getting it laid down) that I feel compelled to share…..
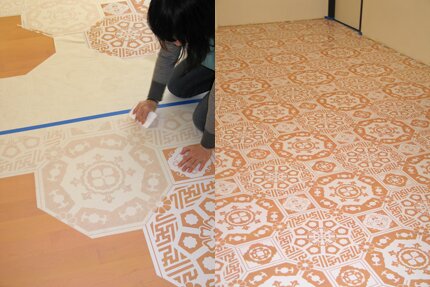
Here is the design in all its dizzying glory being puzzle-pieced together and how it looks tonight whilst awaiting the first layer of stain.
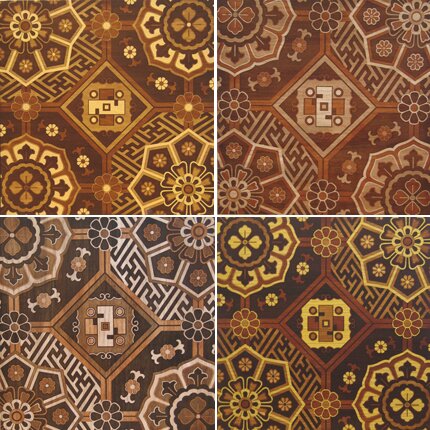
Just so you have an idea WHY I even wanted to do this in the first place, here are the color samples I did. Each one was colored and weeded a little differently. Can you see?? Can you find Waldo? If you do, I’ll give you a million dollars. No kidding!
February 3rd, 2008
Stair Master
Our wood surfaces adornment assault continues! I showed you some of the finished landings in an earlier post. Now I’m happy to report that the connecting staircases are finished as well and they are GAWDeous!
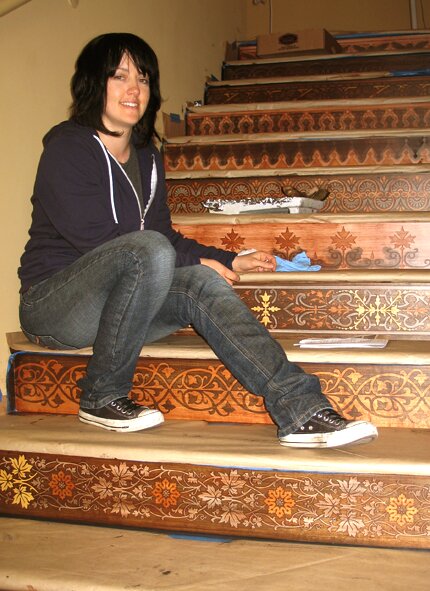
My ever-abler new studio assistant, Melissa, did all the actual staining work on the stairs so is now an official “stair master”. You can imagine by looking at all that pattern on all those stairs that this was quite a bit of work!
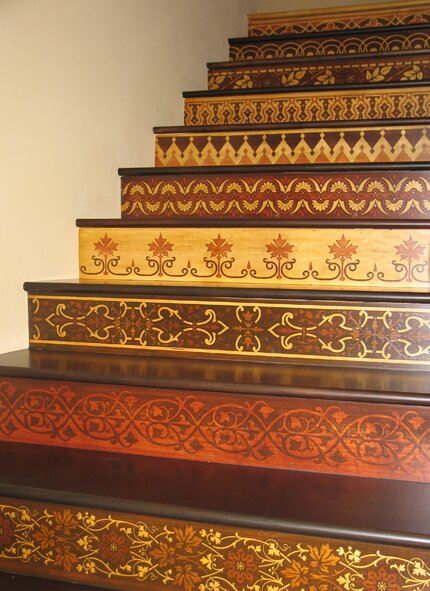
There are 24 different border patterns used. I was able to set up the colorways first in Adobe Illustrator to try and get some nice balance and contrast over the length of each set of stairs.
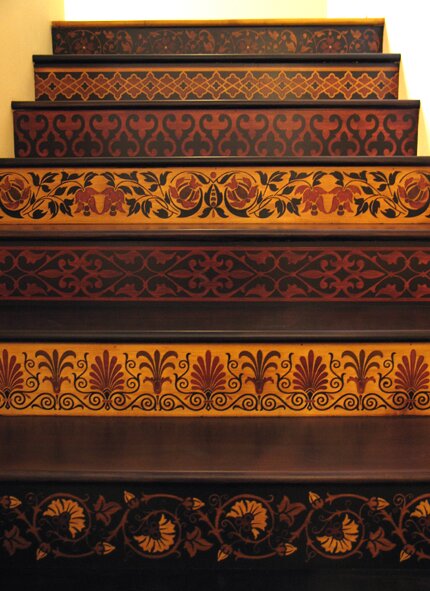
The stair treads themselves are alternately stained a dark brown and a warm black and they look great from above as well but it’s the view looking up that is extra special. On a technical note, we have been using Bona’s Traffic for the topcoat and used this on the cork floor as well. It’s a bit tricky and pricey but lays down a lovely soft satin finish that has already proven it’s worth as a very durable topcoat for a commercial setting.
January 7th, 2008
Walkin the Planks
If you can pardon the dust and disregard the blue tape and plastic I would like to share with you some pics of some of our wood floor projects in the new building. We have two sets of stairs on each side going up to the Mezzanine space that houses the studio and creative offices and I had them both finished off with Maple hardwood flooring. One set will be in the gold, red and black colorway and the other in shades of brown.
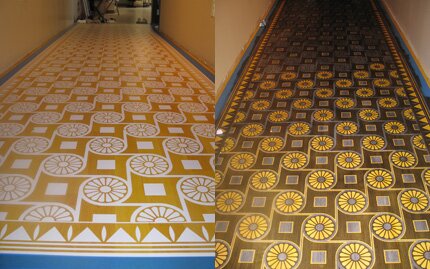
A lovely classic Egyptian pattern in progress.
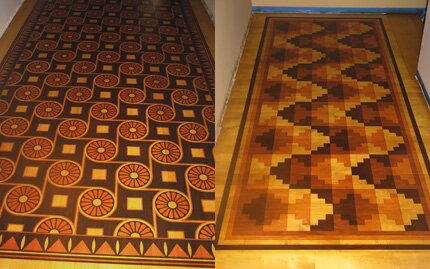
All finished on the left and a Peruvian “rug” on the right.
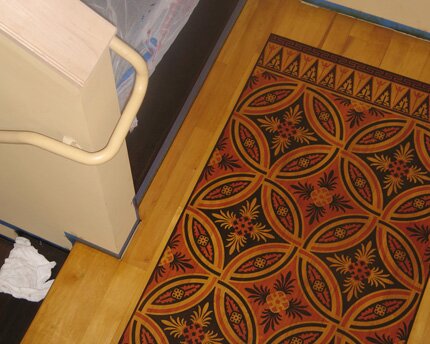
This is the same design I did in my home but done as another “rug” to fit the small landing. Next up: 48 stair risers each with a different border pattern. Yes, I HAVE created a monster. I’ll tell you what though, all this hard work and running up and down stairs is doing wonders for this ageing bod. There are definitely lots of benefits to be had in hard, physical labor!
December 6th, 2007
Laid to Rest
It’s done! I had nightmares that something would go horribly wrong and my million dollar cork floor would get ruined somehow. Well, it didn’t REALLY cost a million dollars, but it definitely wasn’t cheap and we had another big chunk invested in labor and materials, AND there have been quite a few BIG things going awry lately, BUT I think we are safe. Knock wood.
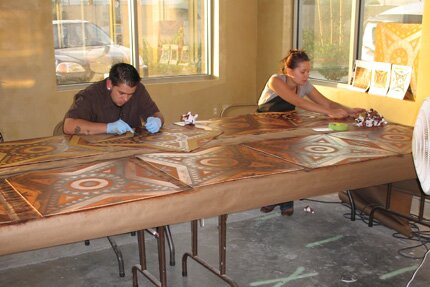
Once we got the whole assembly line thing down we were cranking out 35 tiles (on a good day). Richard and Michelle from our staff are pulling out the last pieces of the pattern to ready them for the final stenciled layer.
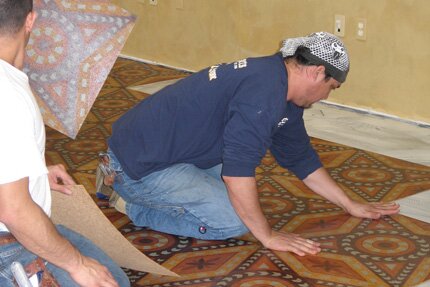
Here the trusty installers are pressing the last tiles into place. Good thing THEY were good as we used all 120 tiles that we made. Phew!
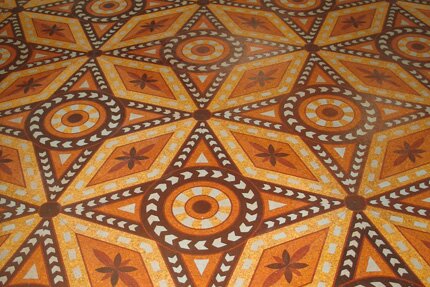
If you’ve never walked on a cork floor, let me tell you it’s heaven. Especially when all your other floors are concrete. It feels like you just put brand new gel inserts in your shoes! I’m so in love, I’ve ordered some more for my home office floor where I think I will do a very large “stained-in-place” meandering cherry blossom branch. Then we will see how it holds up to my greyhound’s toenails.



 Copyright © Designamour